This is a temporary solution until the Zapier integration is fully complete.
1
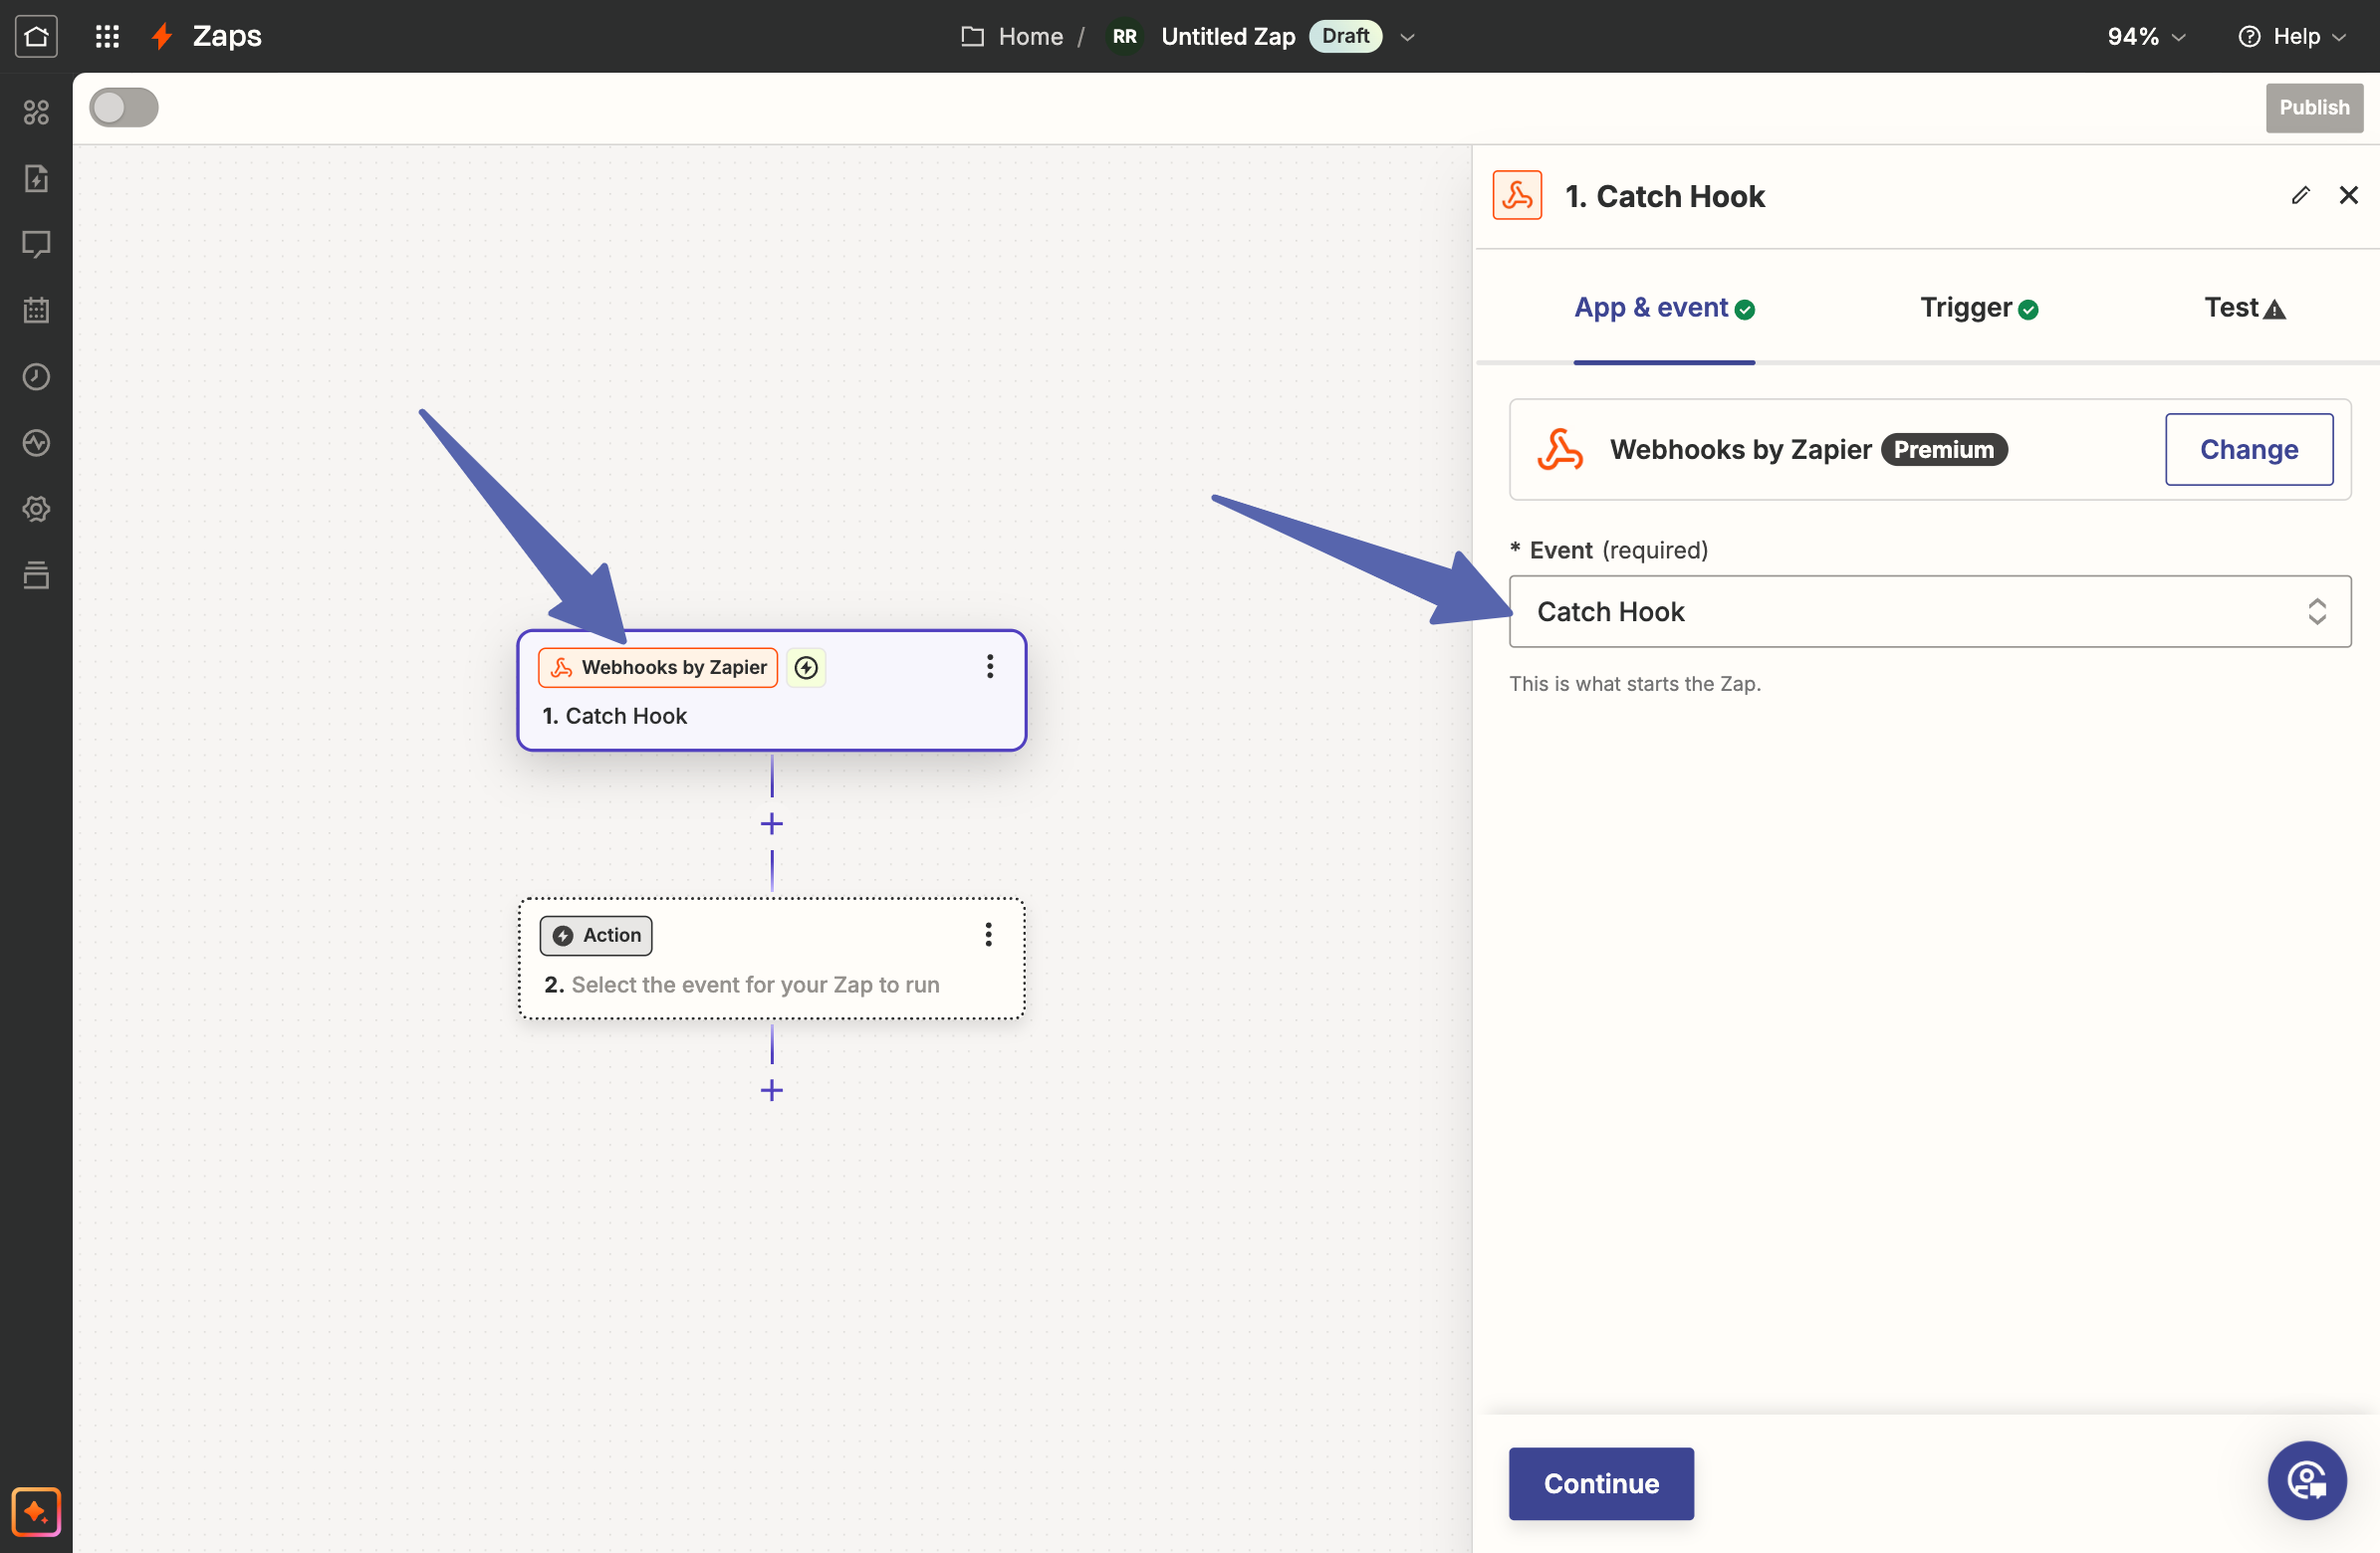
Create a New Zap in Zapier
- Log in to your Zapier account and create a new Zap.
- Set the trigger to Webhooks by Zapier.
- In the App & event section, set the Event to Catch Hook.
- Click Continue.
2
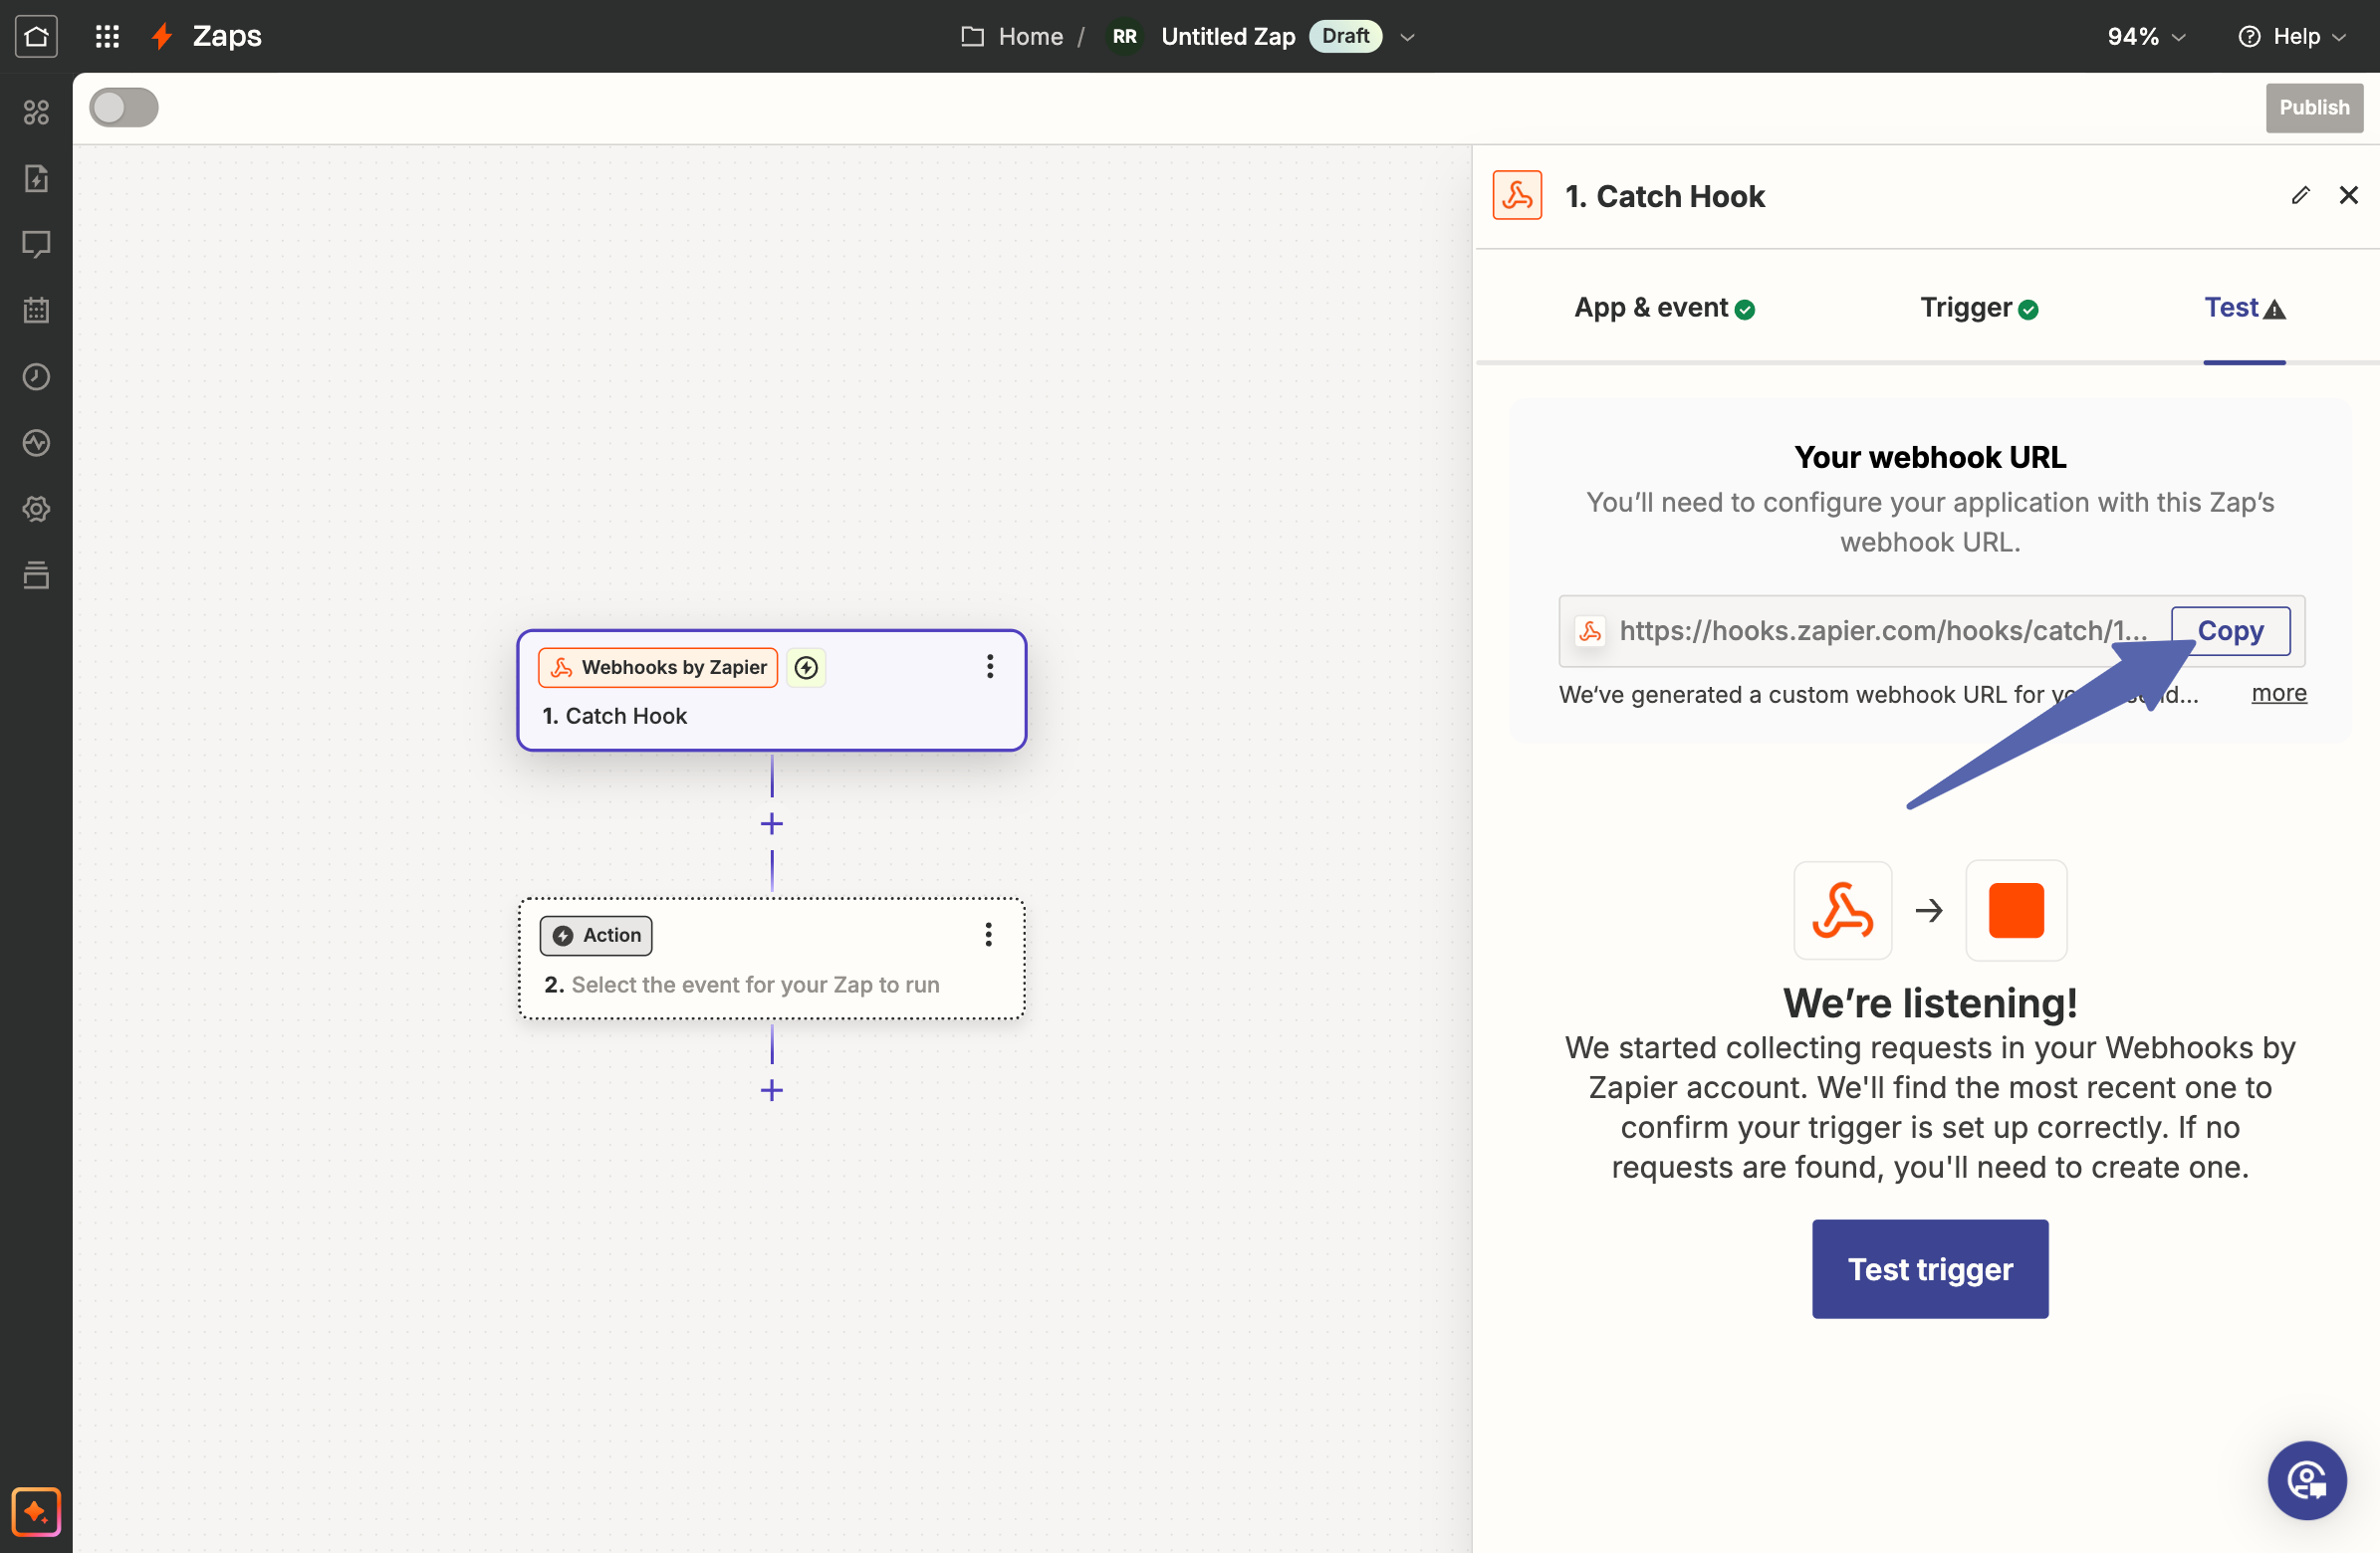
Copy the Webhook URL from Zapier
- In the Test section, click on Copy to copy the webhook URL provided by Zapier.
3
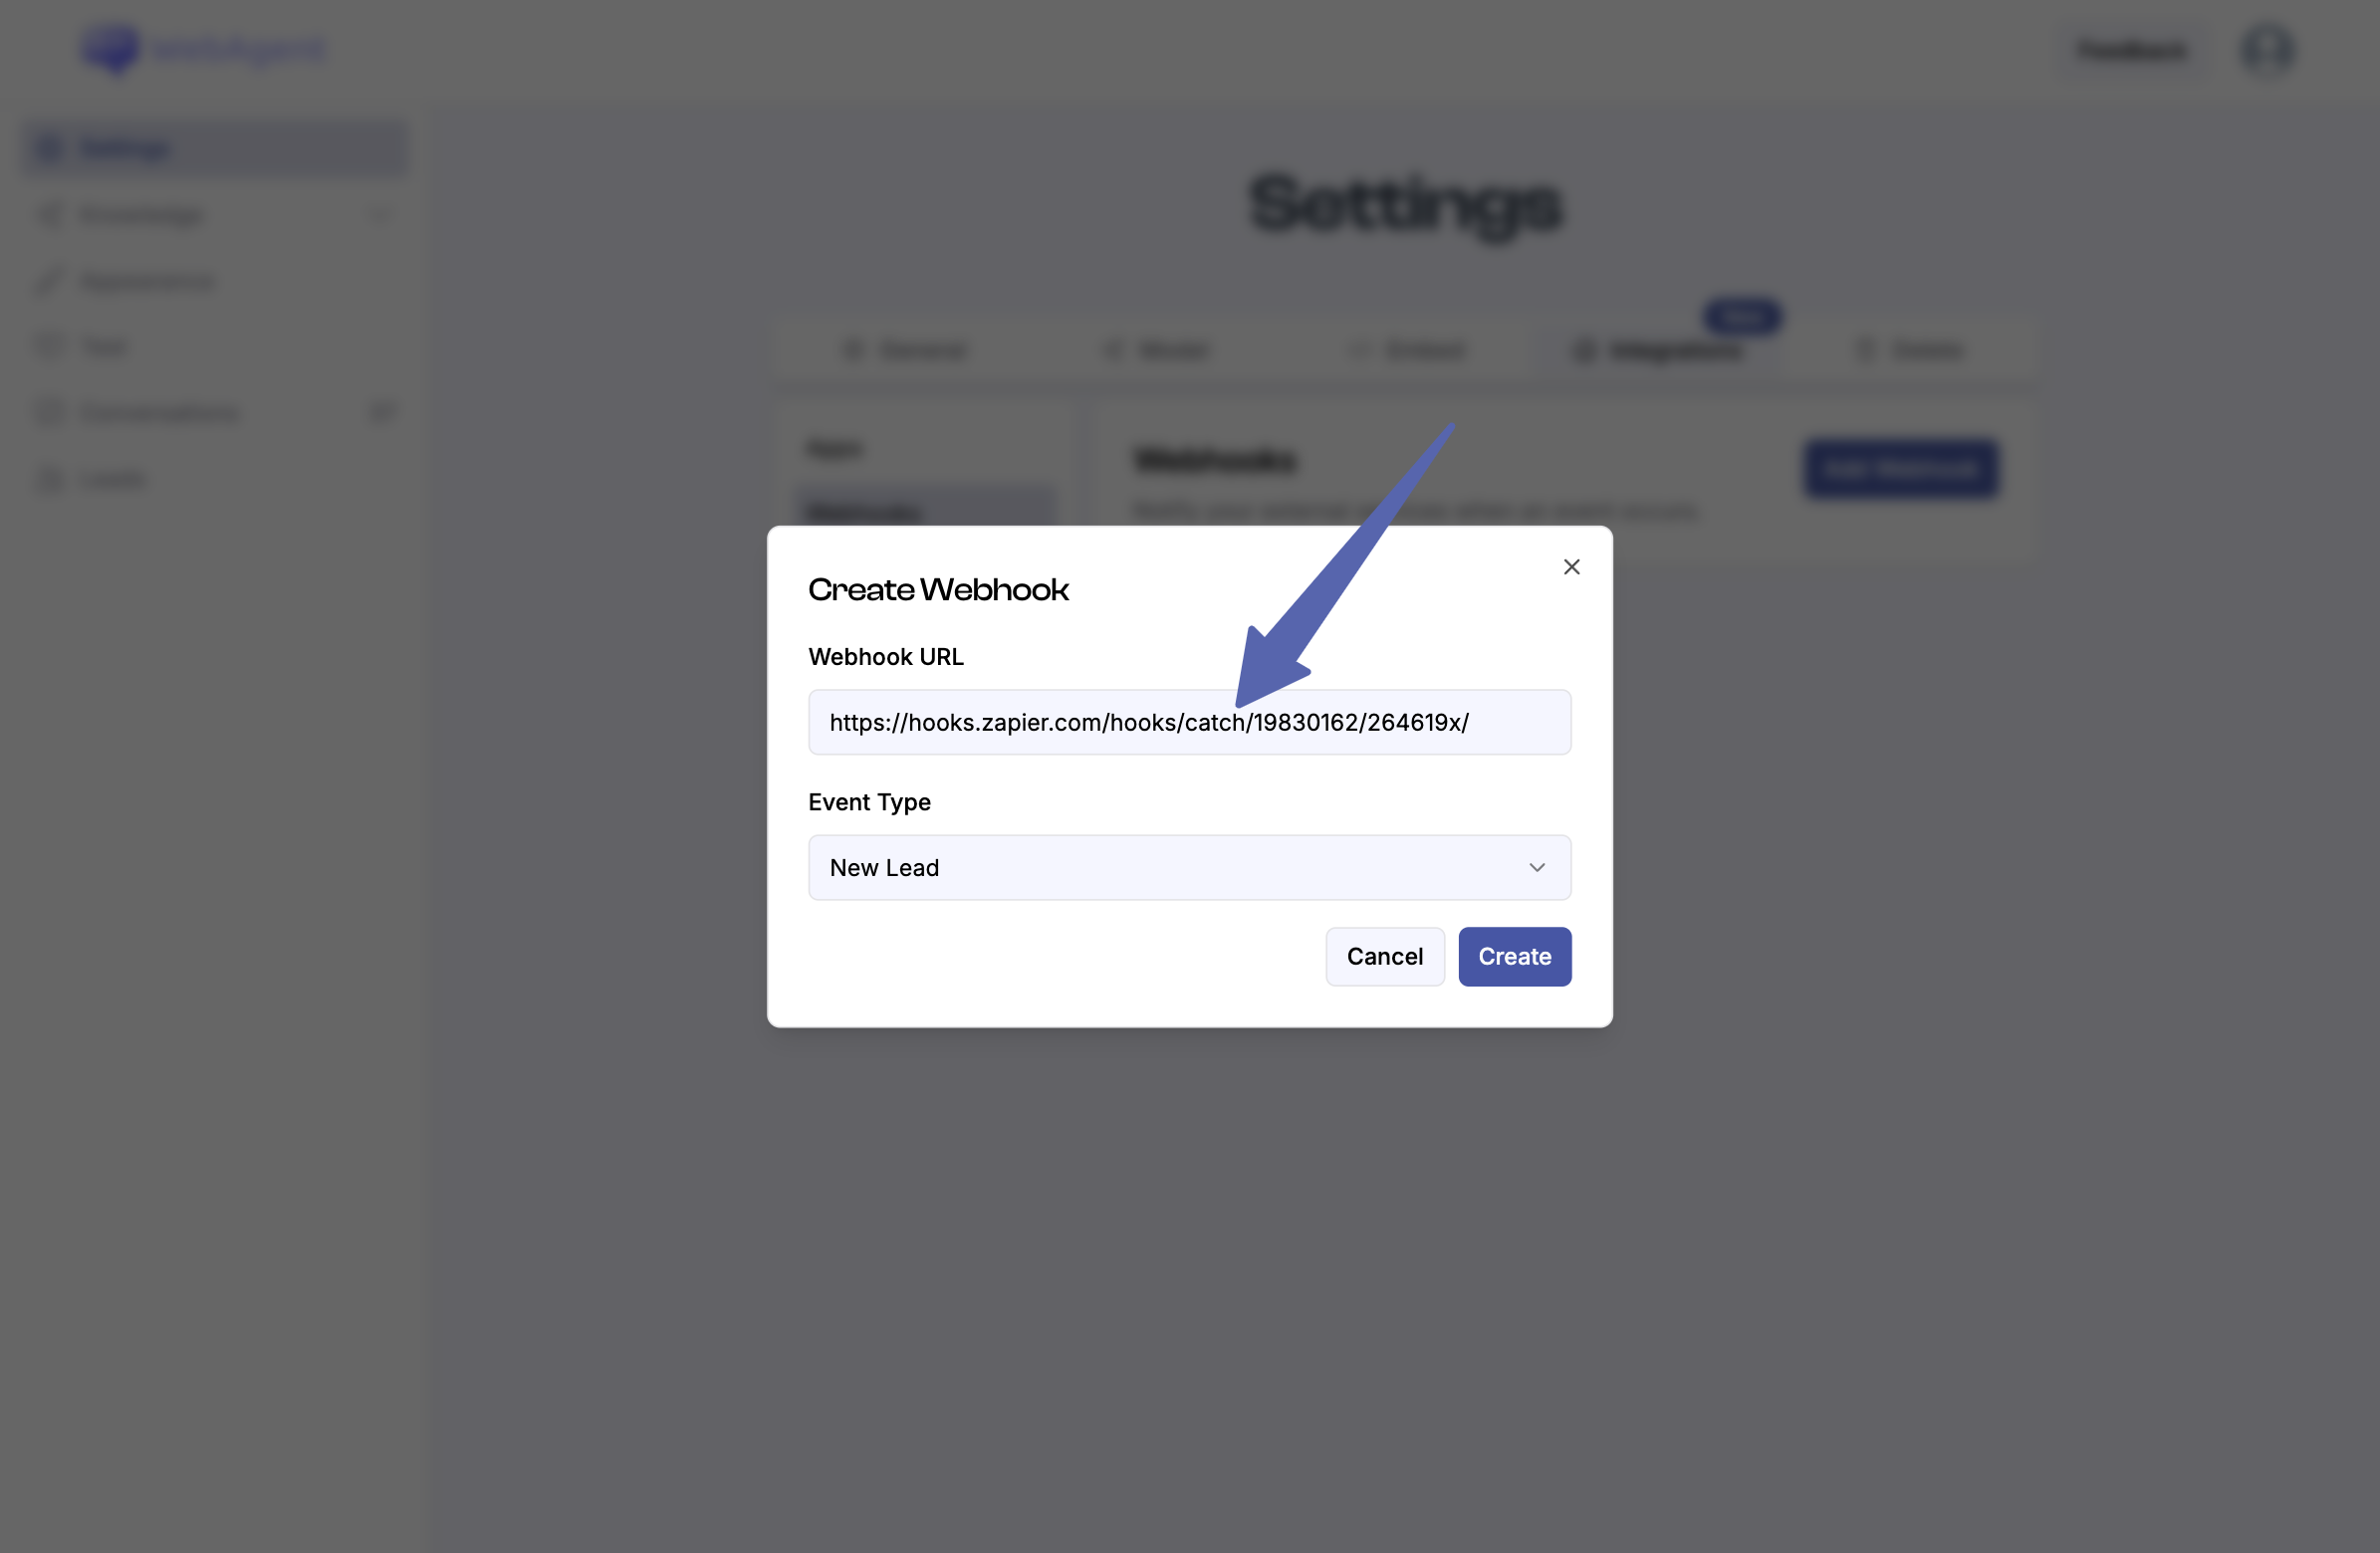
Create a Webhook in WebAgent.ai
- Log in to your WebAgent.ai account, select your chatbot, then go to Settings.
- Navigate to the Integrations tab and click on Webhooks.
- Click on Add Webhook to create a new webhook.
- Paste the webhook URL you copied from Zapier into the Webhook URL field.
- Set the Event to New Lead.
- Click on Create to create the webhook.
4
Run a Test to Capture Webhook Data
- In your WebAgent.ai account, navigate to the chatbot’s Test page.
- Start a conversation with your chatbot and fill out the contact form to simulate a new lead. Ensure the Capture Leads toggle is enabled under the General tab in your chatbot’s settings.

5
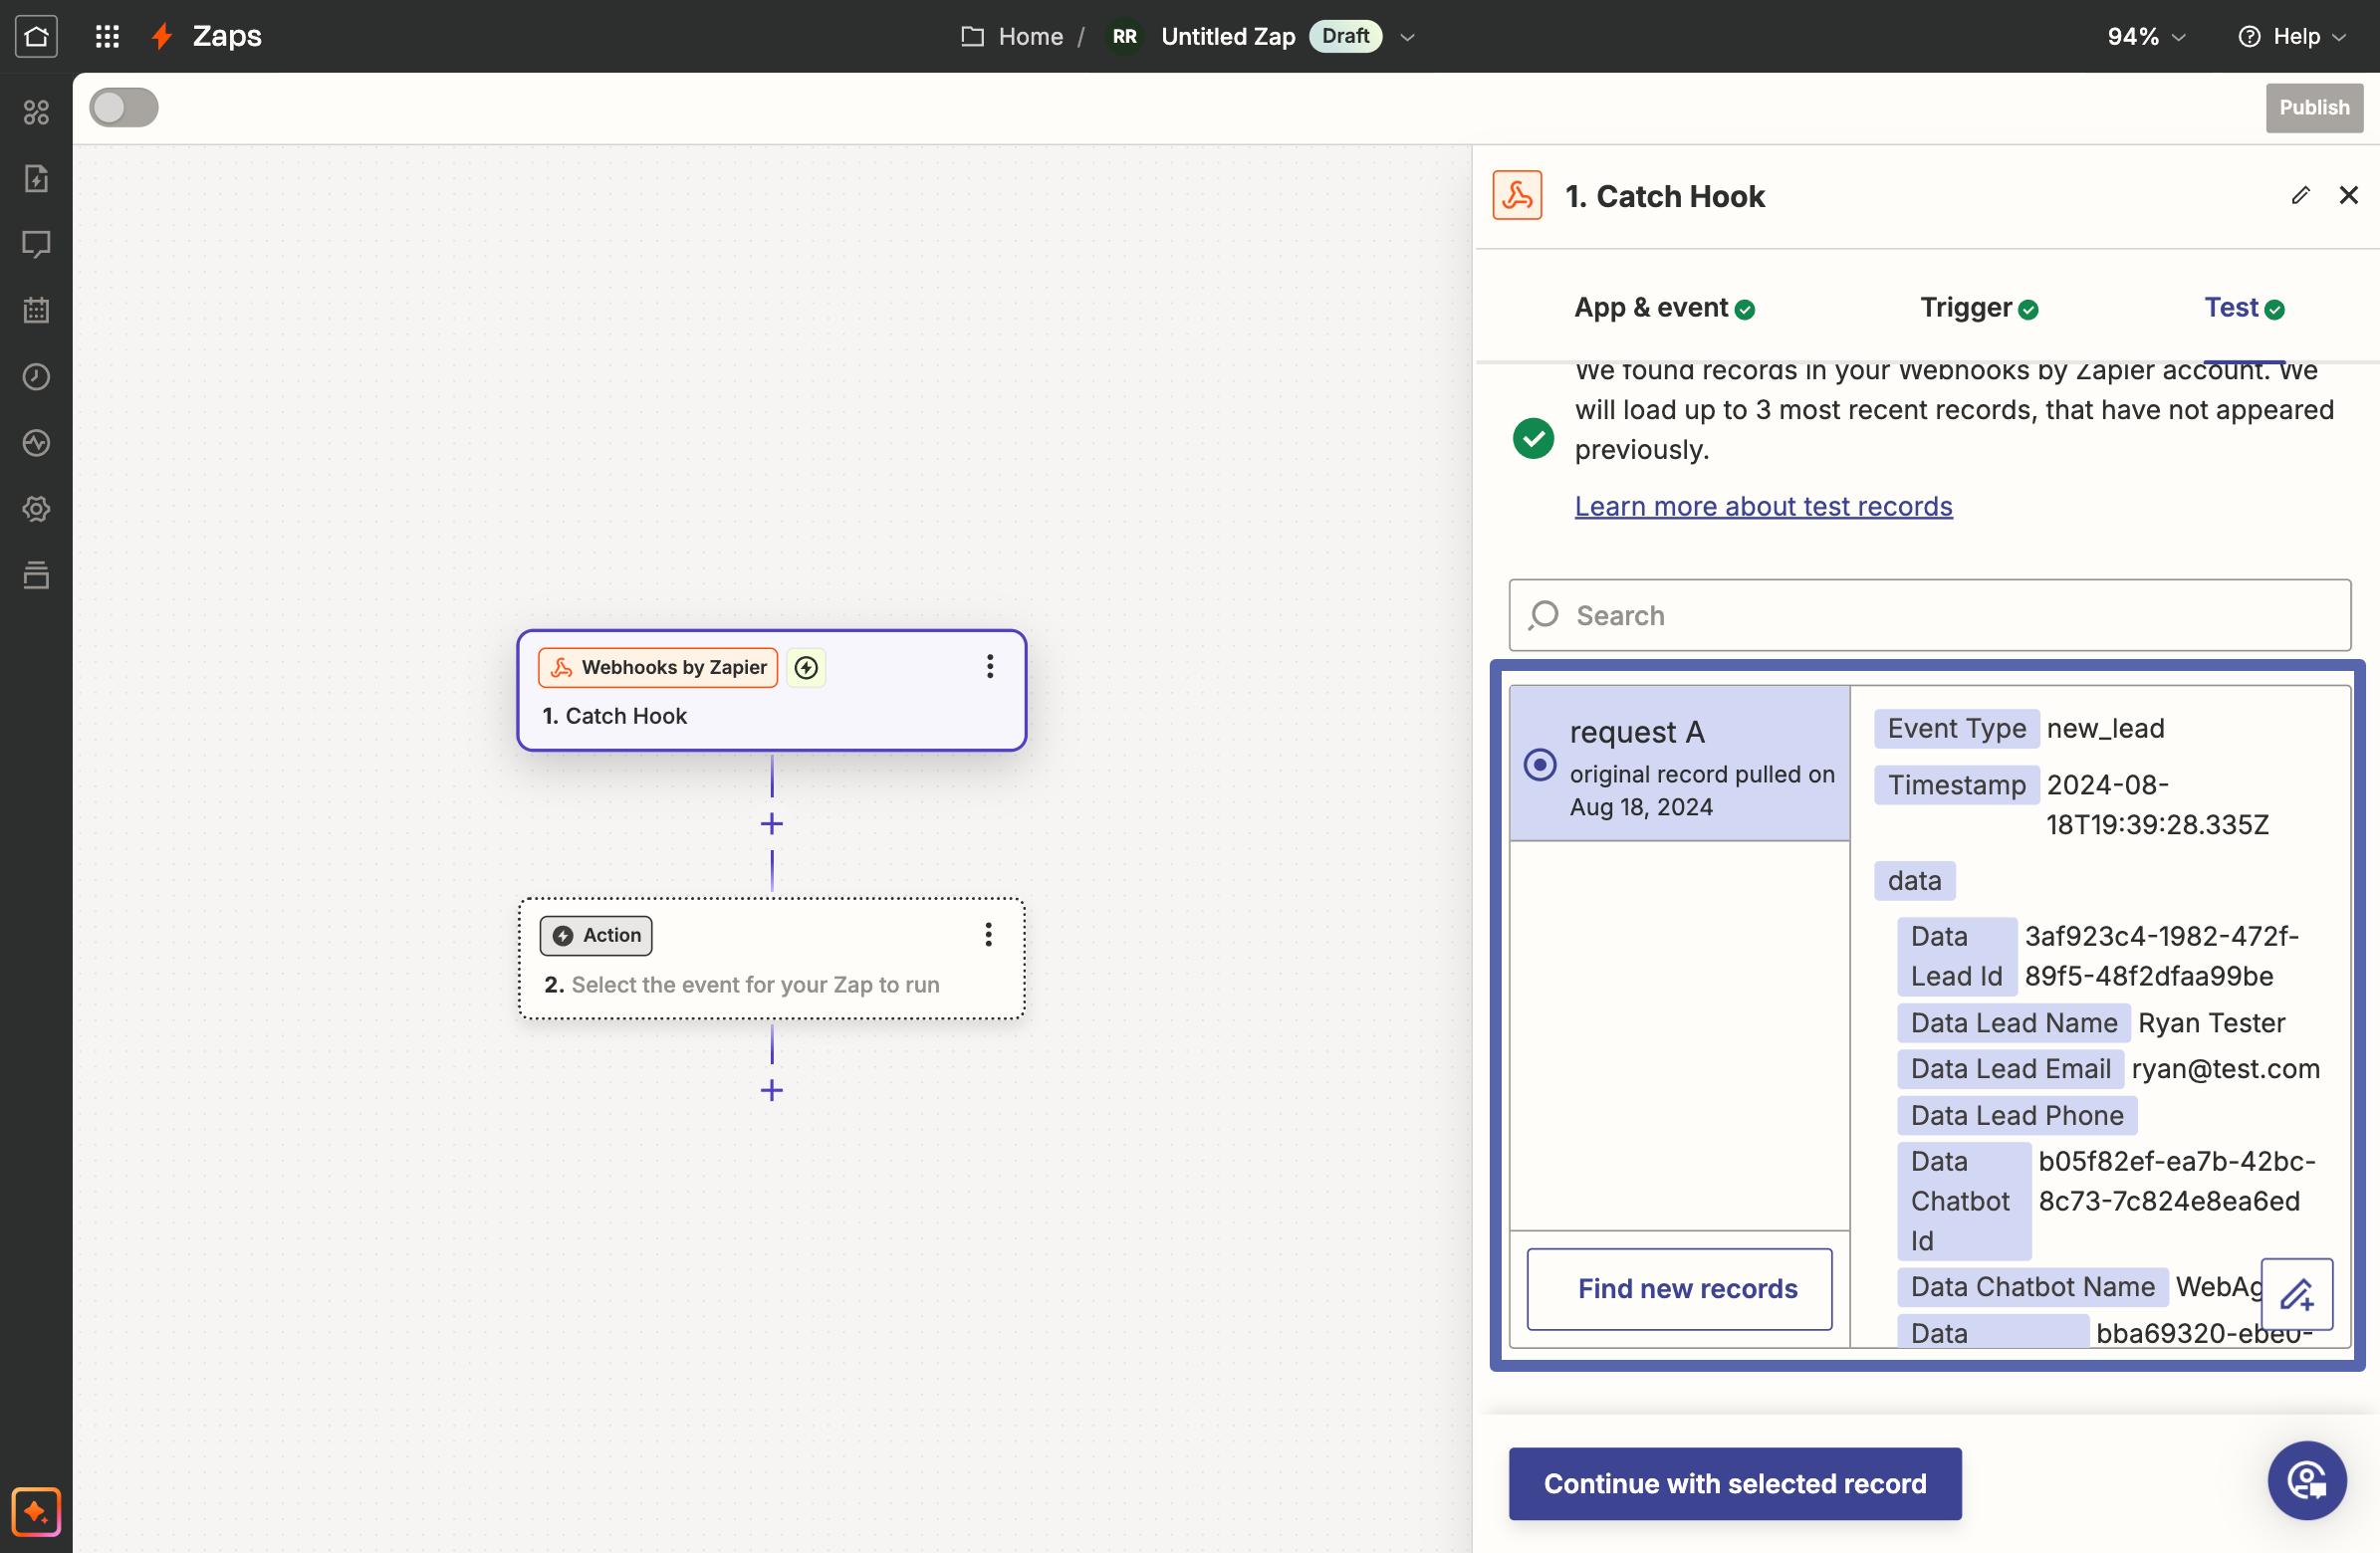
Test the Trigger in Zapier
- Go back to Zapier and click on Test Trigger in the Test section.
- You should see the data from the test conversation appear.
- Once you see the data, click Continue with selected record to finish setting up your Zapier action.